
The testing industry is slowly coming to the realisation that the role of a tester will be more technical in future. Gone will be the days where tester focuses only on black and white box testing. With the adoption of DevOps model, the line that separates tester from other technical resources will slowly disappear. A tester will eventually be asked to perform more than a single role, including writing automation scripts to assist with unit testing, deploying and testing web services/APIs in test environments, verifying databases upon application commit etc.
It astonishes me that some of my colleagues in the testing industry have no idea how to develop and deploy web services. If current industry standard is any indication, unless testers continue to develop and enrich their technical knowledge, it is more than likely that they will find themselves without a job in distant future. For example, at Atlassian, QA Engineers are essentially developers who are entrusted to maintain quality of their code. They do not hire QA Analysts who come from pure testing background. As companies look to become more agile and efficient in delivery, more technical savvy resources will be required to take the organisation to the next level. Hence, testers cannot remain comfortable in their current role. Unless they evolve, they will not survive in the industry.
With that view, I decided to write a series of articles that delve into automation testing. Depending on which company you work for, you must have come across some of the tools that are used for automation: HP UFT, TOSCA, Selenium Web Driver etc. While HP UFT or TOSCA require heavy investment by the company as they are quite expensive, selenium web driver is an open source tool and requires no upfront investment. The only investment that will be required is to hire the correct people with the right expertise.
Please note that these articles will not be like traditional tutorials. Frankly, I don’t like the way some of the tutorials or books teach materials to the readers. For example, if you have looked at any of the programming language books for dummies, you will see that they spend dozens of chapters on teaching the reader the basics of the language before actually showing the application. I think it is the wrong approach. I think for any tutorial, you should first show what the final product will look like and then proceed to explain the details. This way, the reader, will have a baseline to work with. If the reader does not like the look of the product, they can move on to a different tutorial on a different website.
For the current article, I will demonstrate how to develop an ASP.NET webpage, deploy it and then run automation script using Selenium Web Driver. I will develop and deploy it on a win7 laptop with IIS.
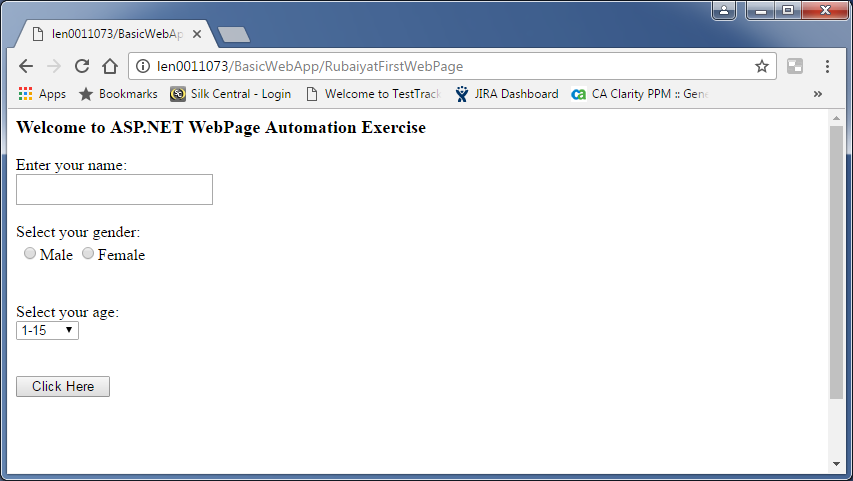
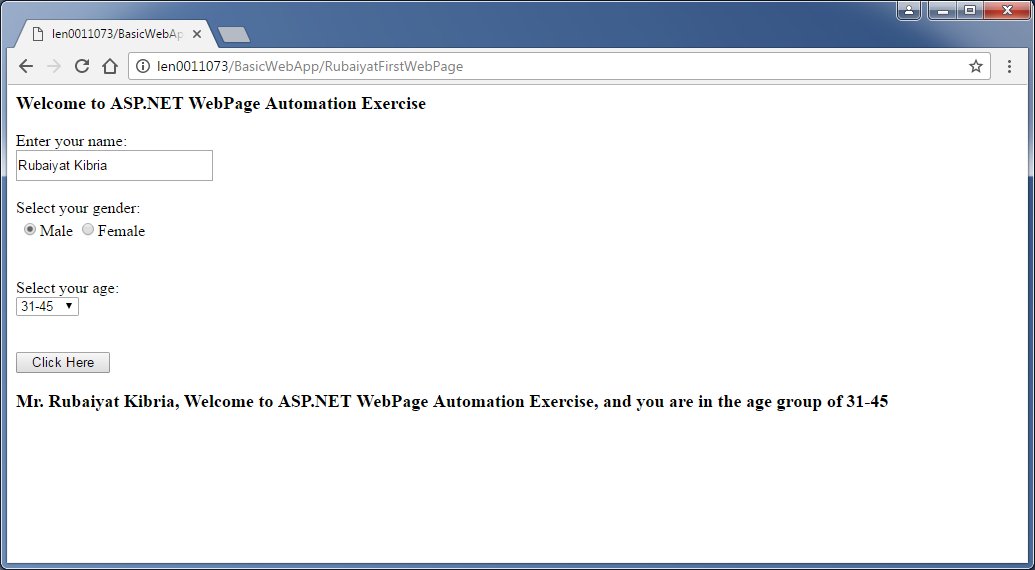
The purpose is to develop and deploy a webpage with textbox, button and dropdown menus. Then use Selenium web driver to automate this simple webpage. Once you have achieved that, then you can move on to automate more advanced demo webpages as practice.
The ASP.NET webpage will look like below. This webpage was created in Visual Studio 2015 using C#.
To understand how to create such a ASP.NET webpage in Visual Studio, please refer to MSDN article: Walkthrough: Creating a Basic Web Forms Page in Visual Studio
Then deploy the webpage to IIS. In order to do this, please follow below steps:
- Install IIS on laptop; refer to MSDN article: How TO: Enable Internet Information Services (IIS)
- Publish the ASP.NET webpage; please ensure that you provide folder rights on c:\inetpub\wwwroot for creating the folders. If you have difficulty, then create a folder under wwwroot and then copy the entire project there. Go to IIS and right click on the Website and select “Convert to Application”
- Open Chrome browser and try to access the webpage as http://machinename/BasicWebApp/YourPageName.aspx. This should show the proper page.
- The below link provides a step-by-step guide on deploying ASP.NET website on IIS in our local machine.
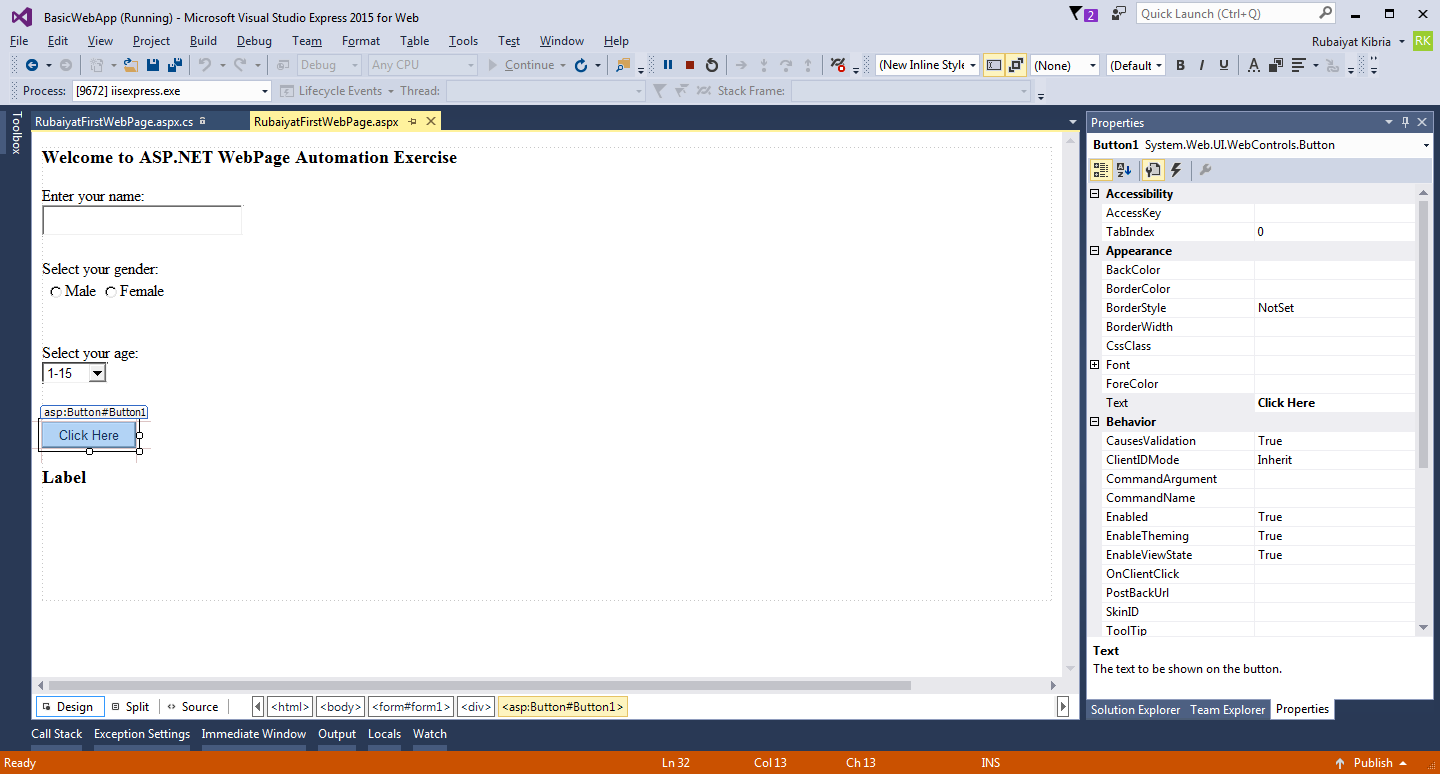
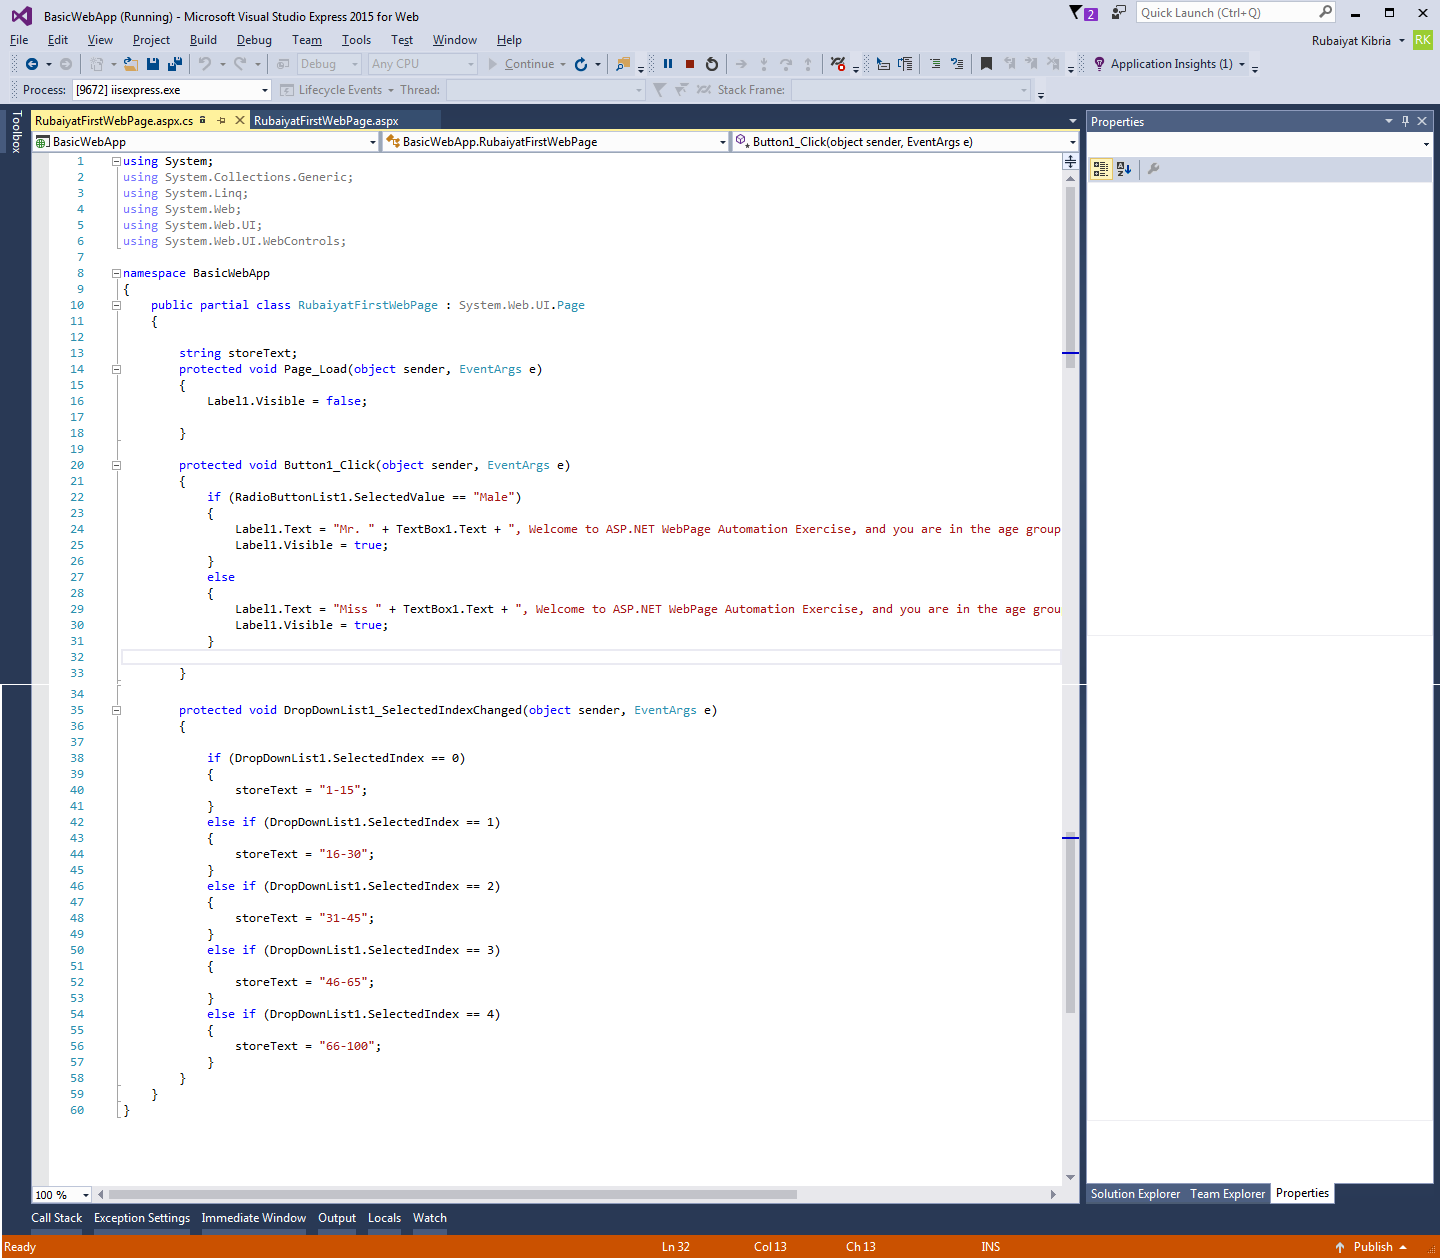
For reference purposes, please see below the design and code behind for the Visual Studio ASP.NET project.
Now that the ASP.NET webpage is well and truly up and running, it is time to create the Selenium web driver scripts. For Selenium Web Driver, we will develop automation scripts in Eclipse in Java. There are many websites that explain how to setup Eclipse, provide some basic understanding of Java and explain how to create Selenium scripts.
The TOOLSQA is a good website that teaches you everything you need to get started.
- First get a basic understanding of Java: Learn basic Java
- Then install Java on your laptop: Download and Install Java
- Next Download and Start Eclipse IDE
- Then Configure Eclipse with Selenium WebDriver
- Create the automation script in Java; see below screenshot
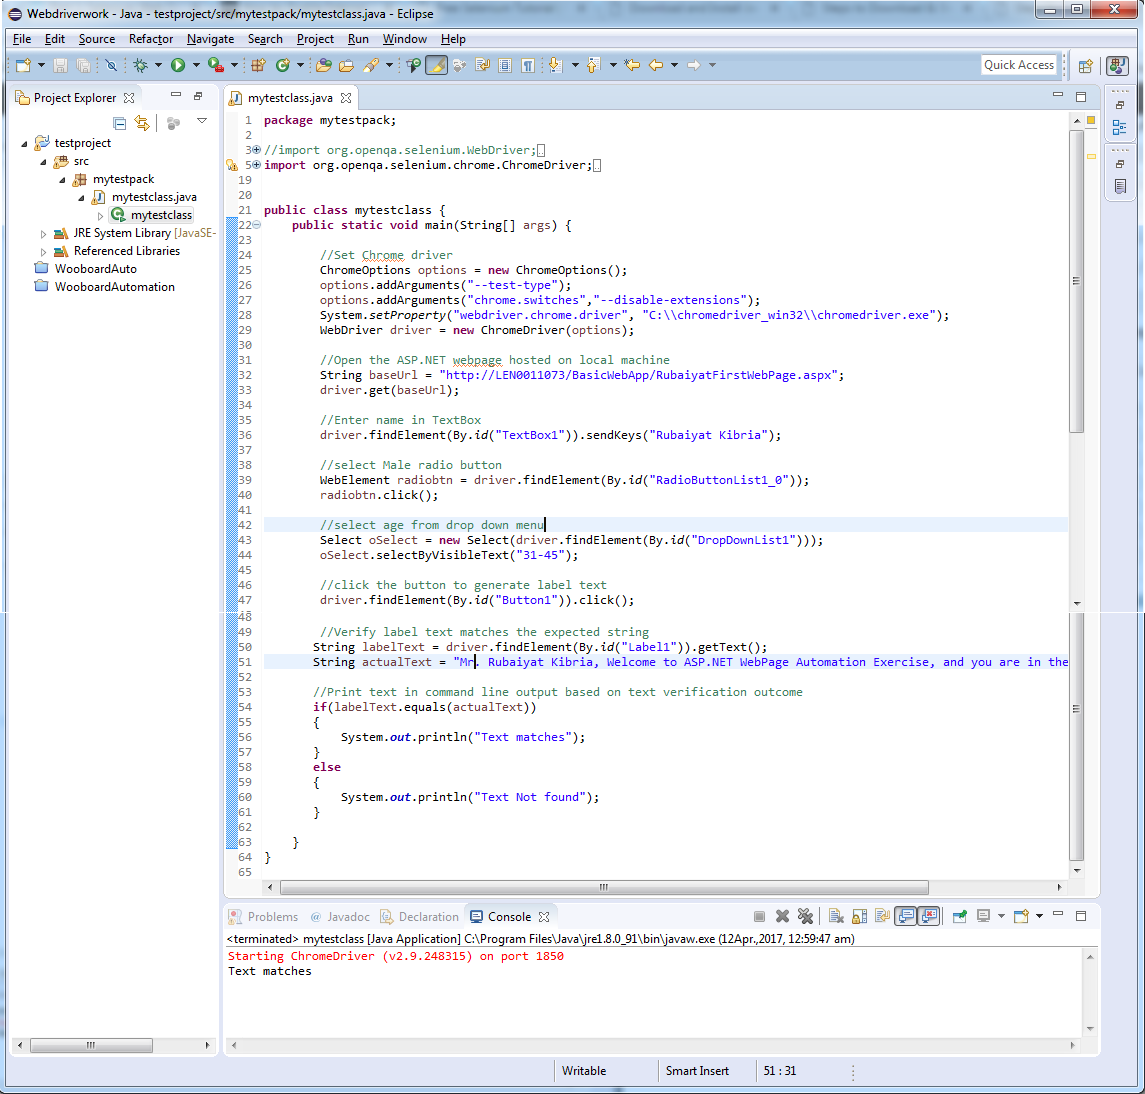
Now run the automation script by clicking the Play button  in Eclipse. This will open a new instance of the Chrome browser and execute the following:
- Enter a name in the textbox
- Select a radio button
- Select a value from the drop down menu
- Click the button, and
- Verify that the text in label matches to the expected text.
The automation output will be as below.
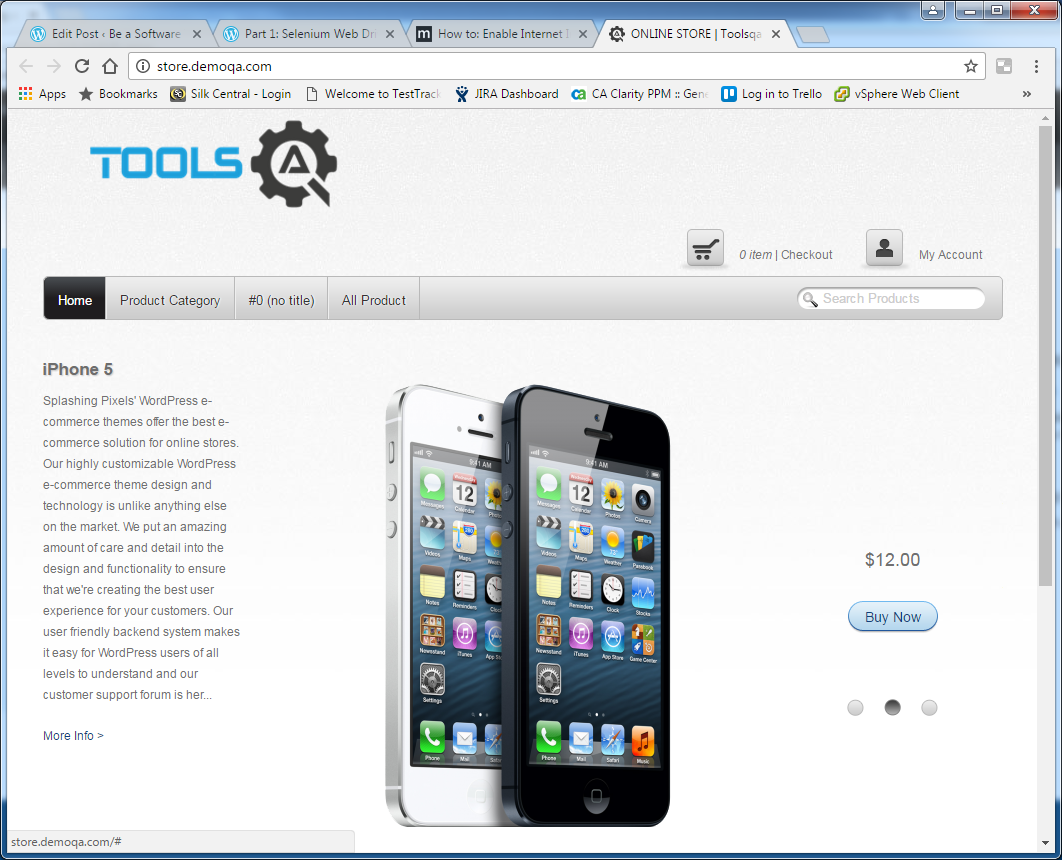
Once you have managed to get your head around this very basic automation, please proceed to automating the ToolsQA Automation Practice Form as below.

Following that, please proceed to automating a demo website as below.
Please NOTE: Learning a new tool requires time and patience. One cannot become an expert overnight. But you should be able to gain a level of confidence by following the above process.
